Branching
Like in other interpreted languages like Python, 4-spaced indentation allows for scoped code execution, and allows for some unique primitives, like branched parallelization.
PAC program graphs allow for two distinct types of connections - Fork and Linear (default).
Linear
The linear connection is the straightforward default. For instance :
1. get {{Name}} and {{Website}} from notion
2. print {{payload}}
Which is interpreted as :

or with a few steps that need to run sequentially in between :
1. get {{Name}} and {{Website}} from notion
    1.1. search the web for {{Name}} and store in {{result}}
    1.2. check if {{result}} contains {{Website}}
    1.3. go to step 2
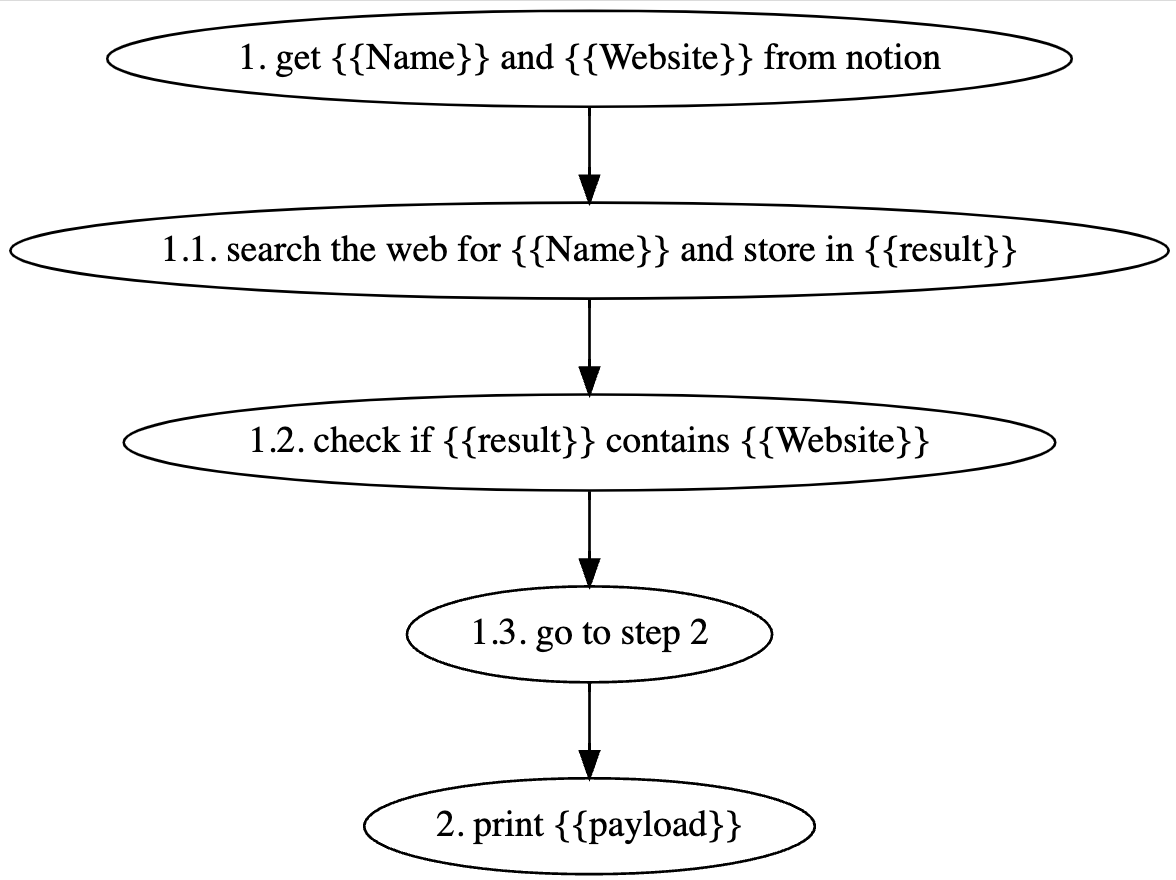
2. print {{payload}}
Interpreted as :

Forks
Forks can be used when a message needs to be duplicated and passed to two or more parallel processes, instead of running them sequentially. A tabbed (4 spaces) indent and the prefix - is used to indicate a fork. For instance :
Parallelization
1. get {{Name}} and {{Website}} from notion
    - 1.1. search the web for {{Name}}
    - 1.2. scrape the website with url {{Website}}
2. print {{payload}}
Is interpreted as a graph like this :

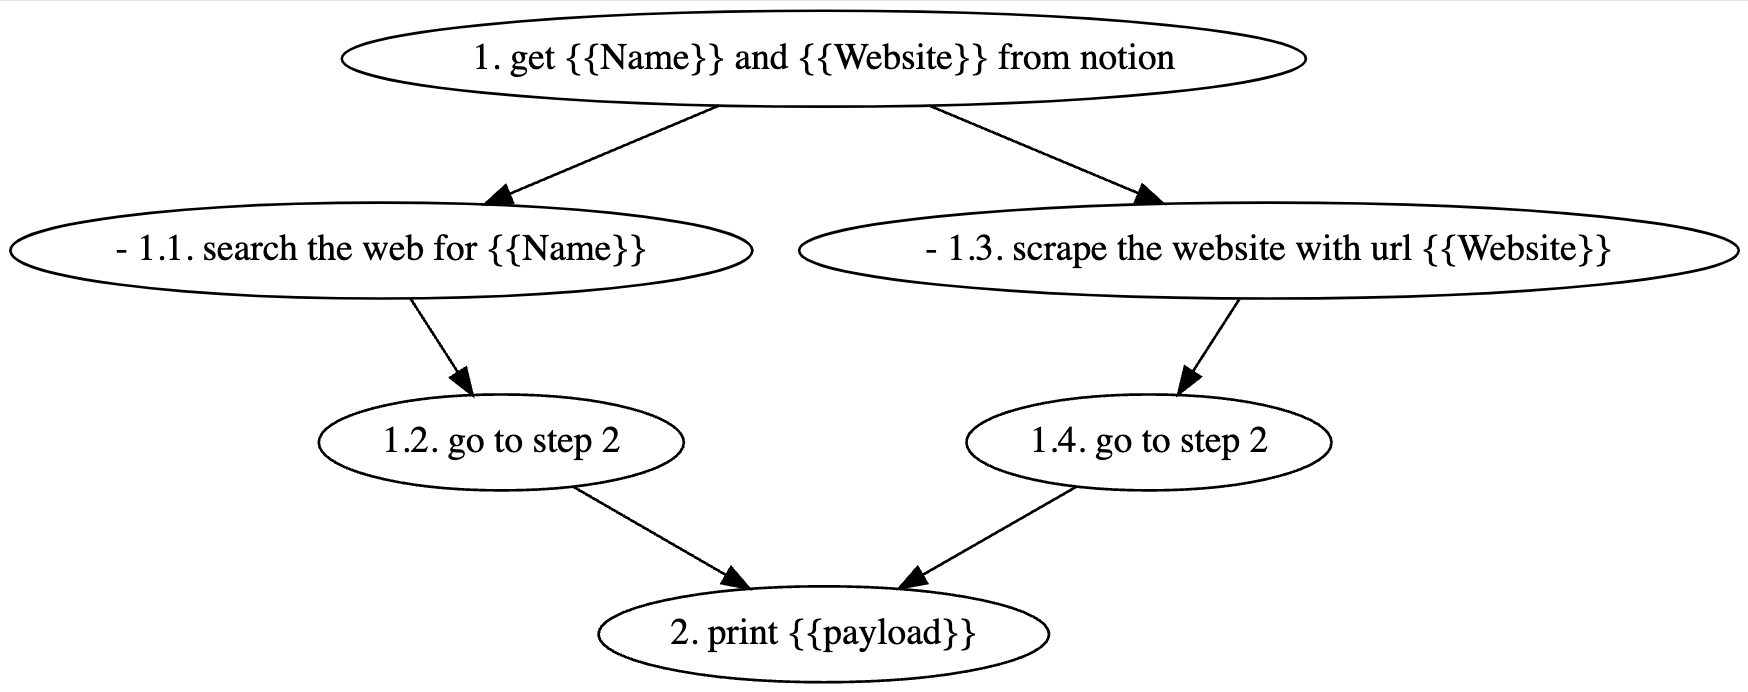
As seen above, since step 1.1. and step 1.2. are forks from step 1, they don't come and connect back to step 2 automatically.
To do that we will need to string them together with a few linear go to steps.
1. get {{Name}} and {{Website}} from notion
    - 1.1. search the web for {{Name}}
      1.2. go to step 2
    - 1.3. scrape the website with url {{Website}}
      1.4. go to step 2
2. print {{payload}}
Which is interpreted as this :

Reuse
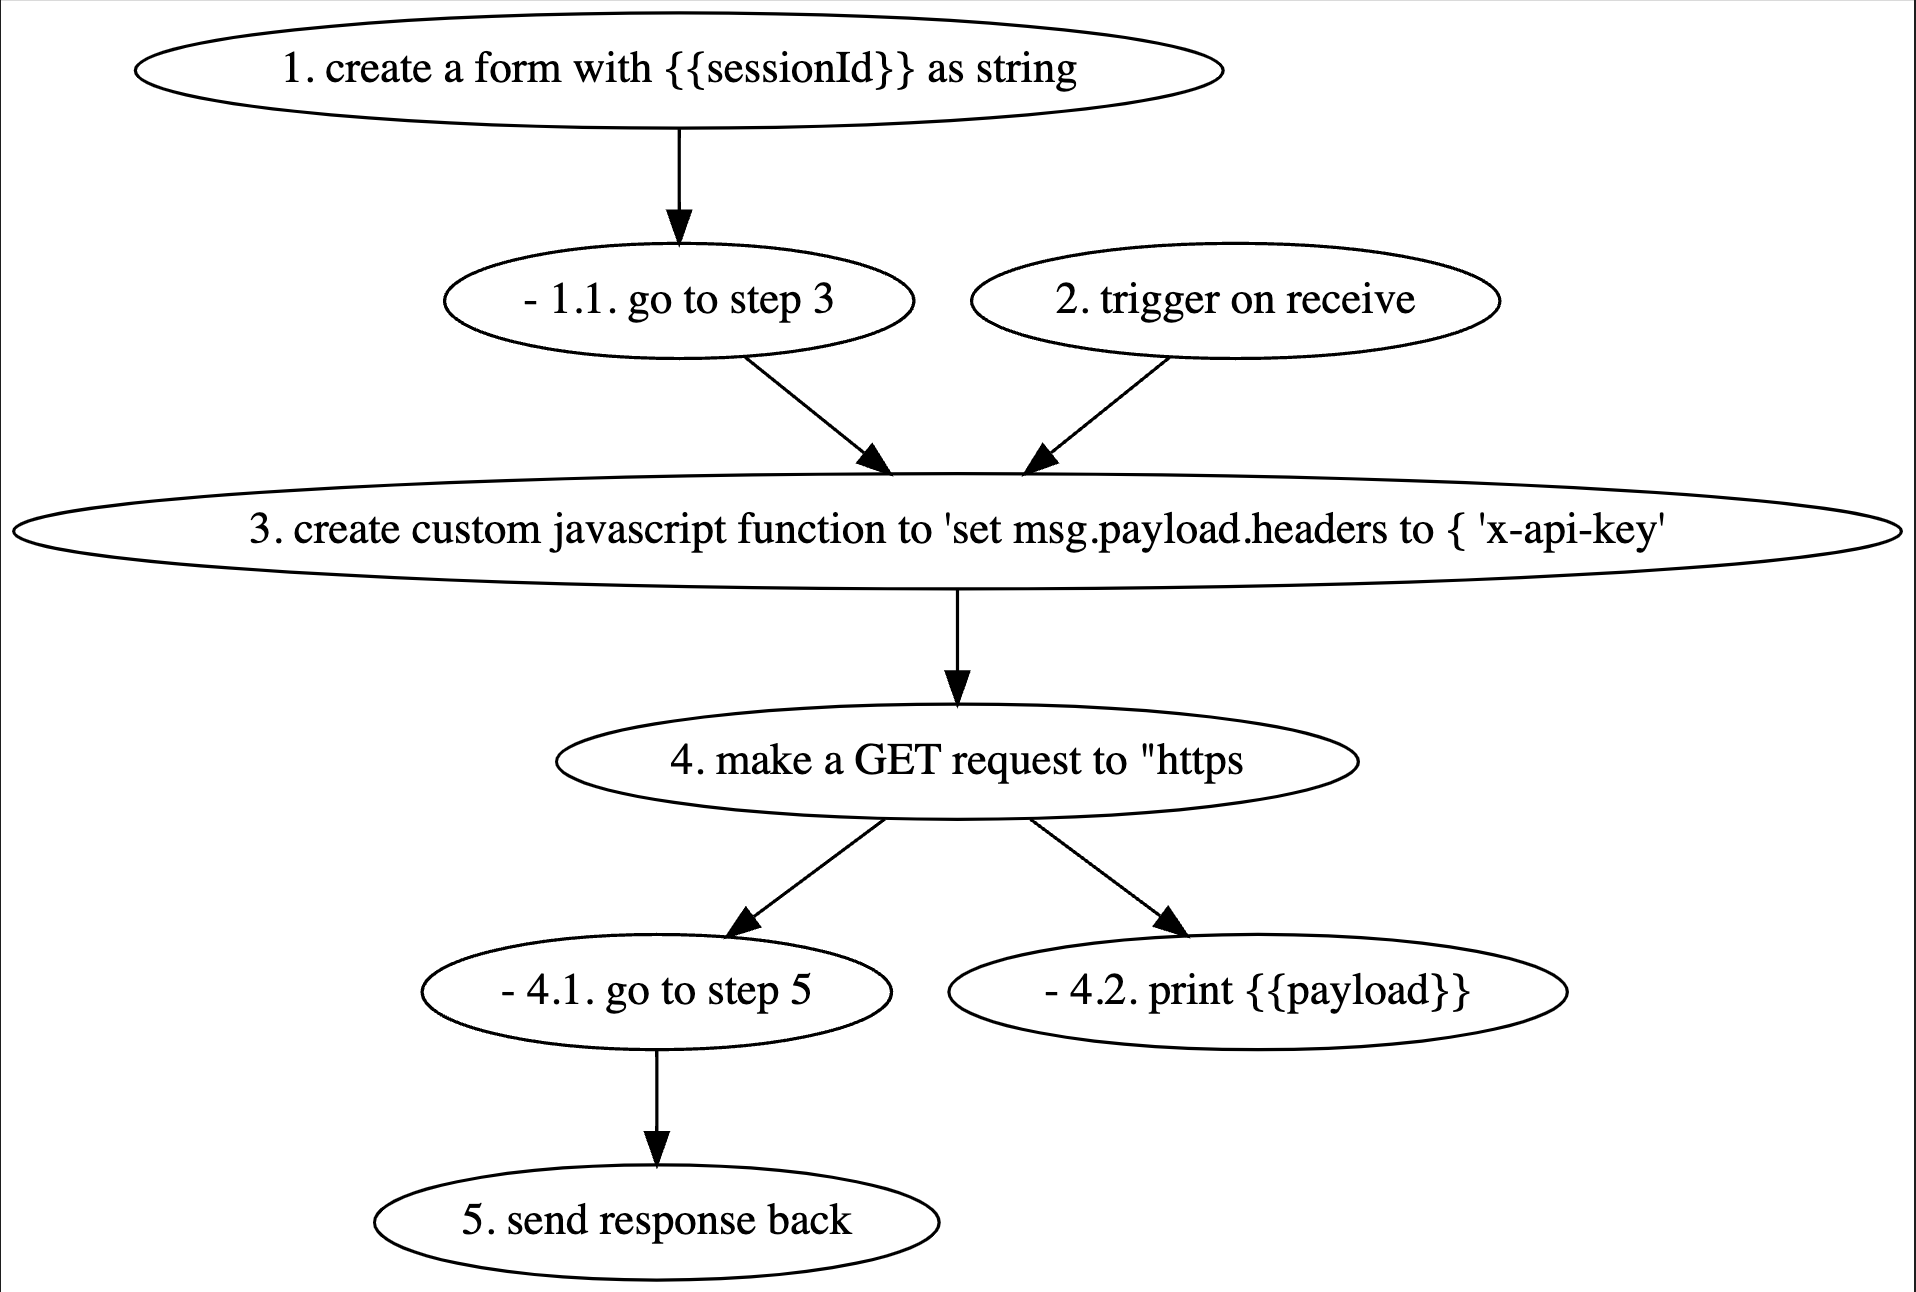
1. create a form with {{sessionId}} as string
    - 1.1. go to step 3
2. trigger on receive
3. create custom javascript function to 'set msg.payload.headers to { 'x-api-key' : 'x'}'
4. make a GET request to "https://internalapi.io/pac/v1/session/" + msg.payload.sessionId
    - 4.1. go to step 5
    - 4.2. print {{payload}}
5. send response back
Is interpreted as a graph like this :

Note in the above graph, if opened as a dashboard using .show(), will expose a form with a field sessionId that you can interact with in the browser, which will run the steps from step 1 to step 4.2.
function.show()But it also exposes a callable API interface, which can be called using .call(), which will run the steps from step 2 to step 5, through step 4.1.
function.call({ "sessionId": "session-1a65d38c57cb"})In this way step 3 and step 4, which are crucial data fetching logic, can be reused by both an API as well as a interactive UI.